Hi all over at Robyn Fetish our challenge is design a easel card.
I really enjoyed making this card and I hope you enjoy seeing what our great design team as made too. .http://robynsfetishchallengeblog.blogspot.com
Our sponser for this challege is Fred she says
Http://fred-she-said-store.blogspot.com
 The image I used was Nolan and the bullfrog the backing paper was from the serif digi kit called fishing the card was a 6x6 square.
If you would like to see how to make a easel card here are the details.
The image I used was Nolan and the bullfrog the backing paper was from the serif digi kit called fishing the card was a 6x6 square.
If you would like to see how to make a easel card here are the details.
 Step 1
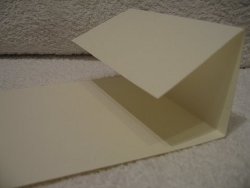
Take your piece of card and fold it in half.
Measure the size of the front as this will be where your decorative panel is attached.
Fold one side in half again.
 Step 2
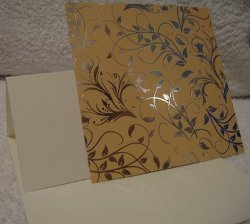
Cut a piece of your fancy card to cover the whole of the front of the card, (the size you measured earlier)
Add your chosen topper to the panel.
I used double sided tape on the lower part and attached it to the folded flap.
The top part of this decorative panel should be free. (As in the photo)
 Step 3
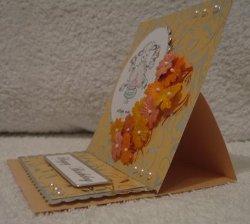
This is what the card will look like from the side, once you have the panel in place.
Make a small label to add to the bottom, I layered mine with silver mirror card and I added a Birthday greeting.
Fix this in place with foam pads, for the top flap to wedge onto. It acts as a stopper.
 Step 4
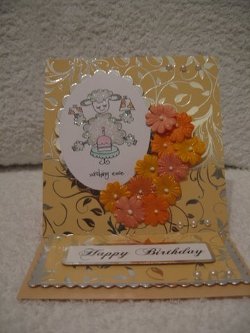
 The front can then decorated with any embelishmnets you have in your stash.
Flat back pearls, little mulberry flowers and glitter.
The top will fold flat, to fit into a standard sized envelope, and then it fits neatly into the stopper, and the easel card stands freely.
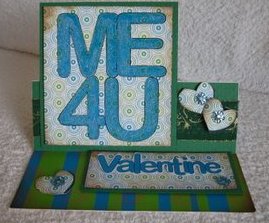
The panel on this card has been made to cover one side of the easel part, and looks just as good.
Paper hearts and germstones are added to the side, and the bottom label holds the card in place.
Try some for yourself...you'll soon get the hang of them!
Easy peasy and very pretty!
see
http://www.card-making-magic.com/easelcard.html
Thanks to cristina for all her wonderfull instructions


